Seasonal Vendor: Difference between revisions
From MCC Island Wiki
More actions
Finished Season 2 and added the entirety of Season 1 |
AFix changes |
||
| (9 intermediate revisions by 3 users not shown) | |||
| Line 1: | Line 1: | ||
The '''Seasonal Vendor''' is the vendor in the [[ | The '''Seasonal Vendor''' is the vendor in the [[Seasonal Plaza]] where the player can buy [[Season 3: Candy Factory#Seasonal Shop-0|season-exclusive cosmetics]] for [[File:Ancient Jungle Shard.gif|32px]] seasonal shards. The Temple Master will currently sell you all season-exclusive cosmetics at the Seasonal shop. All previous and current cosmetics can be seen in the table below. | ||
==Season 4== | |||
All of Season 4's Cosmetics can be bought from the '''Temple Master''' in the [[Seasonal Plaza]] for [[File:Ancient Jungle Shard.gif|32px]] Ancient Jungle Shards. | |||
{| class="wikitable" | |||
|+ | |||
!Display | |||
!Cosmetic | |||
!Cost | |||
!Type | |||
!Rarity | |||
|- | |||
|{{AFix|Ancient Potion.png|200px}} | |||
|[[Ancient Potion]] | |||
|2x [[File:Ancient Jungle Shard.gif|32px]] Ancient Jungle Shards | |||
|Accessory | |||
|{{Rarity|Rare}} | |||
|- | |||
|[[File:Bone Club.png|200px]] | |||
|[[Bone Club]] | |||
|2x [[File:Ancient Jungle Shard.gif|32px]] Ancient Jungle Shards | |||
|Accessory | |||
|{{Rarity|Rare}} | |||
|- | |||
|[[File:Bone Claw.png|200px]] | |||
|[[Bone Claw]] | |||
|2x [[File:Ancient Jungle Shard.gif|32px]] Ancient Jungle Shards | |||
|Accessory | |||
|{{Rarity|Rare}} | |||
|- | |||
|{{AFix|Potion Frenzy.png|200px}} | |||
|[[Potion Frenzy]] | |||
|2x [[File:Ancient Jungle Shard.gif|32px]] Ancient Jungle Shards | |||
|Hat | |||
|{{Rarity|Rare}} | |||
|- | |||
|[[File:Rock on Head.png|200px]] | |||
|[[Rock on Head]] | |||
|2x [[File:Ancient Jungle Shard.gif|32px]] Ancient Jungle Shards | |||
|Hat | |||
|{{Rarity|Rare}} | |||
|- | |||
|[[File:Direwolf Cap.png|200px]] | |||
|[[Direwolf Cap]] | |||
|2x [[File:Ancient Jungle Shard.gif|32px]] Ancient Jungle Shards | |||
|Hat | |||
|{{Rarity|Rare}} | |||
|- | |||
|[[File:Dart Bracer.png|200px]] | |||
|[[Dart Bracer]] | |||
|4x [[File:Ancient Jungle Shard.gif|32px]] Ancient Jungle Shards | |||
|Accessory | |||
|{{Rarity|Epic}} | |||
|- | |||
|{{AFix|Feathery Arm.png|200px}} | |||
|[[Feathery Arm]] | |||
|4x [[File:Ancient Jungle Shard.gif|32px]] Ancient Jungle Shards | |||
|Accessory | |||
|{{Rarity|Epic}} | |||
|- | |||
|{{AFix|Skull Orb (Golden).png|200px}} | |||
|[[Skull Orb (Golden)]] | |||
|4x [[File:Ancient Jungle Shard.gif|32px]] Ancient Jungle Shards | |||
|Accessory | |||
|{{Rarity|Epic}} | |||
|- | |||
|{{AFix|Blowdart.png|200px}} | |||
|[[Blowdart]] | |||
|4x [[File:Ancient Jungle Shard.gif|32px]] Ancient Jungle Shards | |||
|Hat | |||
|{{Rarity|Epic}} | |||
|- | |||
|{{AFix|Feathery Cap.png|200px}} | |||
|[[Feathery Cap]] | |||
|4x [[File:Ancient Jungle Shard.gif|32px]] Ancient Jungle Shards | |||
|Hat | |||
|{{Rarity|Epic}} | |||
|- | |||
|{{AFix|Skull Crown (Golden).png|200px}} | |||
|[[Skull Crown (Golden)]] | |||
|4x [[File:Ancient Jungle Shard.gif|32px]] Ancient Jungle Shards | |||
|Hat | |||
|{{Rarity|Epic}} | |||
|} | |||
==Season 3== | ==Season 3== | ||
All of Season 3's Cosmetics | All of Season 3's Cosmetics could be bought from '''The Inventor''' in the [[Battle Pass Plaza]] for [[File:Candy Factory Token.png|32px]] Candy Factory Tokens. | ||
{| class="wikitable" | {| class="wikitable" | ||
|+ | |+ | ||
| Line 11: | Line 94: | ||
!Rarity | !Rarity | ||
|- | |- | ||
|[[File:Waffle Stack.png| | |[[File:Waffle Stack.png|200px]] | ||
|Waffle Stack | |[[Waffle Stack]] | ||
|25x [[File:Candy Factory Token.png| | |25x [[File:Candy Factory Token.png|32px]] Candy Factory Tokens | ||
|Hat | |Hat | ||
|{{Rarity|Rare}} | |{{Rarity|Rare}} | ||
|- | |- | ||
|[[File:Hairbow (Peppermint).png| | |[[File:Hairbow (Peppermint).png|200px]] | ||
|Hairbow (Peppermint) | |[[Hairbow (Peppermint)]] | ||
|35x [[File:Candy Factory Token.png| | |35x [[File:Candy Factory Token.png|32px]] Candy Factory Tokens | ||
|Hat | |Hat | ||
|{{Rarity|Rare}} | |{{Rarity|Rare}} | ||
|- | |- | ||
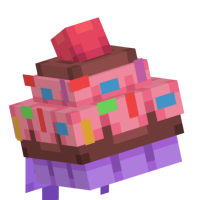
|[[File:Cupcake (Choco).png| | |[[File:Cupcake (Choco).png|200px]] | ||
|Cupcake (Choco) | |[[Cupcake (Choco)]] | ||
|60x [[File:Candy Factory Token.png| | |60x [[File:Candy Factory Token.png|32px]] Candy Factory Tokens | ||
|Hat | |Hat | ||
|{{Rarity|Epic}} | |{{Rarity|Epic}} | ||
|- | |- | ||
| | |{{AFix|Mellowhead (Monarch).png|200px}} | ||
|Mellowhead (Monarch) | |[[Mellowhead (Monarch)]] | ||
|60x [[File:Candy Factory Token.png| | |60x [[File:Candy Factory Token.png|32px]] Candy Factory Tokens | ||
|Hat | |Hat | ||
|{{Rarity|Epic}} | |{{Rarity|Epic}} | ||
|- | |- | ||
| | |{{AFix|Cupcake (Knight).png|200px}} | ||
|Cupcake (Knight) | |[[Cupcake (Knight)]] | ||
|90x [[File:Candy Factory Token.png| | |90x [[File:Candy Factory Token.png|32px]] Candy Factory Tokens | ||
|Hat | |Hat | ||
|{{Rarity|Legendary}} | |{{Rarity|Legendary}} | ||
|- | |- | ||
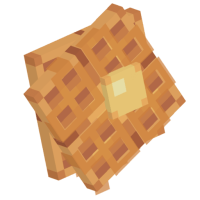
|[[File:Waffle Shield.png| | |[[File:Waffle Shield.png|200px]] | ||
|Waffle Shield | |[[Waffle Shield]] | ||
|25x [[File:Candy Factory Token.png| | |25x [[File:Candy Factory Token.png|32px]] Candy Factory Tokens | ||
|Accessory | |Accessory | ||
|{{Rarity|Rare}} | |{{Rarity|Rare}} | ||
|- | |- | ||
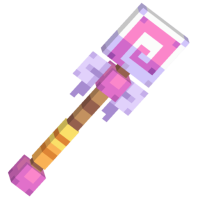
|[[File:Lollipop Staff.png| | |[[File:Lollipop Staff.png|200px]] | ||
|Lollipop Staff | |[[Lollipop Staff]] | ||
|25x [[File:Candy Factory Token.png| | |25x [[File:Candy Factory Token.png|32px]] Candy Factory Tokens | ||
|Accessory | |Accessory | ||
|{{Rarity|Rare}} | |{{Rarity|Rare}} | ||
|- | |- | ||
| | |{{AFix|Choco Shield.png|200px}} | ||
|[[Choco Shield]] | |||
|50x [[File:Candy Factory Token.png| | |50x [[File:Candy Factory Token.png|32px]] Candy Factory Tokens | ||
|Accessory | |Accessory | ||
|{{Rarity|Epic}} | |{{Rarity|Epic}} | ||
|- | |- | ||
| | |{{AFix|S'more Staff (Royalty).png|200px}} | ||
|S'more Staff (Royalty) | |[[S'more Staff (Royalty)]] | ||
|50x [[File:Candy Factory Token.png| | |50x [[File:Candy Factory Token.png|32px]] Candy Factory Tokens | ||
|Accessory | |Accessory | ||
|{{Rarity|Epic}} | |{{Rarity|Epic}} | ||
|- | |- | ||
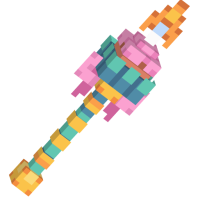
|[[File:Cupcake Staff (Spearhead).png| | |[[File:Cupcake Staff (Spearhead).png|200px]] | ||
|Cupcake Staff (Spearhead) | |[[Cupcake Staff (Spearhead)]] | ||
|75x [[File:Candy Factory Token.png| | |75x [[File:Candy Factory Token.png|32px]] Candy Factory Tokens | ||
|Accessory | |Accessory | ||
|{{Rarity|Legendary}} | |{{Rarity|Legendary}} | ||
| Line 73: | Line 156: | ||
== Season 2 == | == Season 2 == | ||
All of Season 2's Cosmetics could be bought from '''Spacefarer Sarah''' in the [[Battle Pass Plaza]] for [[File:Neon Galaxy Token.png| | All of Season 2's Cosmetics could be bought from '''Spacefarer Sarah''' in the [[Battle Pass Plaza]] for [[File:Neon Galaxy Token.png|32px]] Neon Galaxy Tokens. | ||
{| class="wikitable" | {| class="wikitable" | ||
!Display | !Display | ||
| Line 81: | Line 164: | ||
!Rarity | !Rarity | ||
|- | |- | ||
|[[File:Star Scouter.png| | |[[File:Star Scouter.png|200px]] | ||
|Star Scouter | |[[Star Scouter]] | ||
|25x [[File:Neon Galaxy Token.png| | |25x [[File:Neon Galaxy Token.png|32px]] Neon Galaxy Tokens | ||
|Hat | |Hat | ||
|{{Rarity|Rare}} | |{{Rarity|Rare}} | ||
|- | |- | ||
| | |{{AFix|Space Slug.png|200px}} | ||
|[[Space Slug]] | |||
|35x [[File:Neon Galaxy Token.png| | |35x [[File:Neon Galaxy Token.png|32px]] Neon Galaxy Tokens | ||
|Hat | |Hat | ||
|{{Rarity|Rare}} | |{{Rarity|Rare}} | ||
|- | |- | ||
|[[File:Star Sailor's Tiara.png| | |[[File:Star Sailor's Tiara.png|200px]] | ||
|Star Sailor's Tiara | |[[Star Sailor's Tiara]] | ||
|60x [[File:Neon Galaxy Token.png| | |60x [[File:Neon Galaxy Token.png|32px]] Neon Galaxy Tokens | ||
|Hat | |Hat | ||
|{{Rarity|Epic}} | |{{Rarity|Epic}} | ||
|- | |- | ||
| | |{{AFix|Comet Head.png|200px}} | ||
|[[Comet Head]] | |||
|60x [[File:Neon Galaxy Token.png| | |60x [[File:Neon Galaxy Token.png|32px]] Neon Galaxy Tokens | ||
|Hat | |Hat | ||
|{{Rarity|Epic}} | |{{Rarity|Epic}} | ||
|- | |- | ||
| | |{{AFix|Alien Visor.png|200px}} | ||
|[[Alien Visor]] | |||
|90x [[File:Neon Galaxy Token.png| | |90x [[File:Neon Galaxy Token.png|32px]] Neon Galaxy Tokens | ||
|Hat | |Hat | ||
|{{Rarity|Legendary}} | |{{Rarity|Legendary}} | ||
|- | |- | ||
| | |{{AFix|Constellation Cartographer.png|200px}} | ||
|[[Constellation Cartographer]] | |||
|25x [[File:Neon Galaxy Token.png| | |25x [[File:Neon Galaxy Token.png|32px]] Neon Galaxy Tokens | ||
|Accessory | |Accessory | ||
|{{Rarity|Rare}} | |{{Rarity|Rare}} | ||
|- | |- | ||
| | |{{AFix|Space Slime.png|200px}} | ||
|[[Space Slime]] | |||
|25x [[File:Neon Galaxy Token.png| | |25x [[File:Neon Galaxy Token.png|32px]] Neon Galaxy Tokens | ||
|Accessory | |Accessory | ||
|{{Rarity|Rare}} | |{{Rarity|Rare}} | ||
|- | |- | ||
|[[File:Star Sailor's Staff (Crescent).png| | |[[File:Star Sailor's Staff (Crescent).png|200px]] | ||
|Star Sailor's Staff (Crescent) | |[[Star Sailor's Staff (Crescent)]] | ||
|50x [[File:Neon Galaxy Token.png| | |50x [[File:Neon Galaxy Token.png|32px]] Neon Galaxy Tokens | ||
|Accessory | |Accessory | ||
|{{Rarity|Epic}} | |{{Rarity|Epic}} | ||
|- | |- | ||
| | |{{AFix|Comet Fist.png|200px}} | ||
|[[Comet Fist]] | |||
|50x [[File:Neon Galaxy Token.png| | |50x [[File:Neon Galaxy Token.png|32px]] Neon Galaxy Tokens | ||
|Accessory | |Accessory | ||
|{{Rarity|Epic}} | |{{Rarity|Epic}} | ||
|- | |- | ||
| | |{{AFix|Ray Blaster (Alien).png|200px}} | ||
|Ray Blaster (Alien) | |[[Ray Blaster (Alien)]] | ||
|75x [[File:Neon Galaxy Token.png| | |75x [[File:Neon Galaxy Token.png|32px]] Neon Galaxy Tokens | ||
|Accessory | |Accessory | ||
|{{Rarity|Legendary}} | |{{Rarity|Legendary}} | ||
| Line 143: | Line 226: | ||
== Season 1 == | == Season 1 == | ||
All of Season 1's Cosmetics could be bought from ''' | All of Season 1's Cosmetics could be bought from '''Seasonal Spencer''' in the [[Battle Pass Plaza]] for {{Coin}}Coins. | ||
{| class="wikitable" | {| class="wikitable" | ||
|+ | |+ | ||
| Line 152: | Line 235: | ||
!Rarity | !Rarity | ||
|- | |- | ||
| | |{{AFix|Starfish Staff.png|200px}} | ||
|[[Starfish Staff]] | |||
|90,000 {{Coin}} Coins | |90,000 {{Coin}} Coins | ||
|Accessory | |Accessory | ||
|{{Rarity|Rare}} | |{{Rarity|Rare}} | ||
|- | |- | ||
|[[File:Sea Shell.png| | |[[File:Sea Shell.png|200px]] | ||
|Sea Shell | |[[Sea Shell]] | ||
|135,000 {{Coin}} Coins | |135,000 {{Coin}} Coins | ||
|Hat | |Hat | ||
|{{Rarity|Rare}} | |{{Rarity|Rare}} | ||
|- | |- | ||
| | |{{AFix|Coral Fist.png|200px}} | ||
|[[Coral Fist]] | |||
|180,000 {{Coin}} Coins | |180,000 {{Coin}} Coins | ||
|Accessory | |Accessory | ||
|{{Rarity|Epic}} | |{{Rarity|Epic}} | ||
|- | |- | ||
|[[File:Coral Crown.png| | |[[File:Coral Crown.png|200px]] | ||
|Coral Crown | |[[Coral Crown]] | ||
|270,000 {{Coin}} Coins | |270,000 {{Coin}} Coins | ||
|Hat | |Hat | ||
|{{Rarity|Epic}} | |{{Rarity|Epic}} | ||
|- | |- | ||
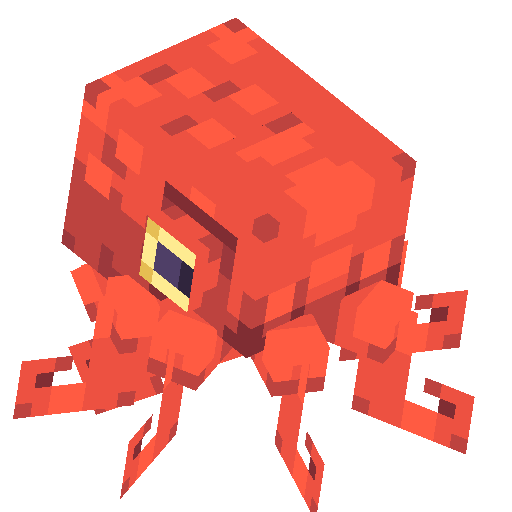
| | |{{AFix|Octopus.png|200px}} | ||
|Octopus | |[[Octopus]] | ||
|450,000 {{Coin}} Coins | |450,000 {{Coin}} Coins | ||
|Hat | |Hat | ||
|{{Rarity|Legendary}} | |{{Rarity|Legendary}} | ||
|} | |} | ||
Latest revision as of 14:13, 21 November 2024
The Seasonal Vendor is the vendor in the Seasonal Plaza where the player can buy season-exclusive cosmetics for ![]() seasonal shards. The Temple Master will currently sell you all season-exclusive cosmetics at the Seasonal shop. All previous and current cosmetics can be seen in the table below.
seasonal shards. The Temple Master will currently sell you all season-exclusive cosmetics at the Seasonal shop. All previous and current cosmetics can be seen in the table below.
Season 4
All of Season 4's Cosmetics can be bought from the Temple Master in the Seasonal Plaza for ![]() Ancient Jungle Shards.
Ancient Jungle Shards.
| Display | Cosmetic | Cost | Type | Rarity |
|---|---|---|---|---|
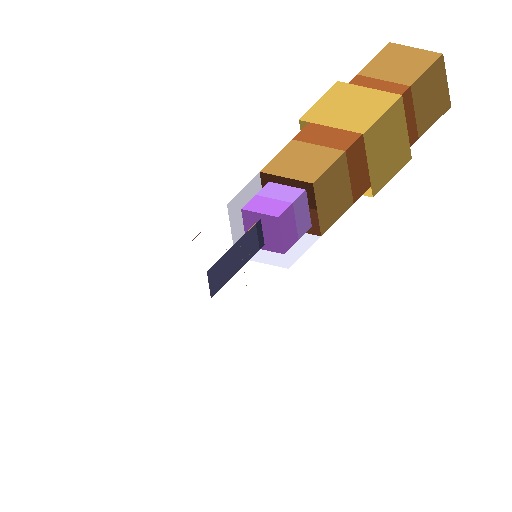
| Ancient Potion | 2x |
Accessory | ||
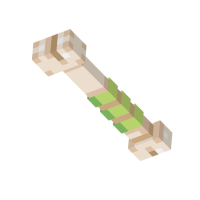
|
Bone Club | 2x |
Accessory | |
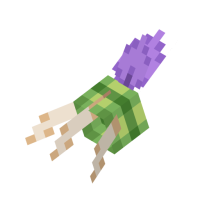
|
Bone Claw | 2x |
Accessory | |
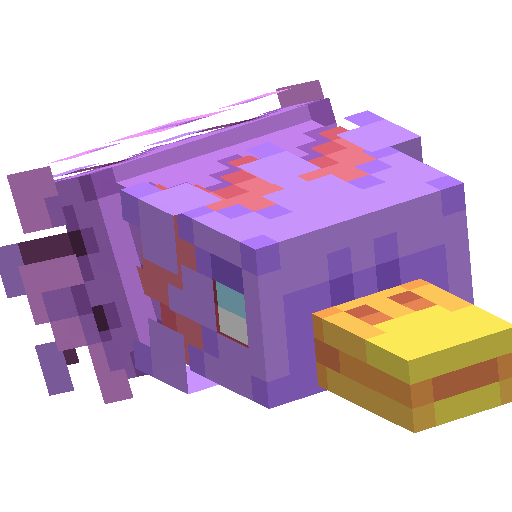
| Potion Frenzy | 2x |
Hat | ||
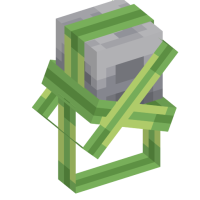
|
Rock on Head | 2x |
Hat | |
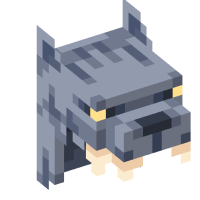
|
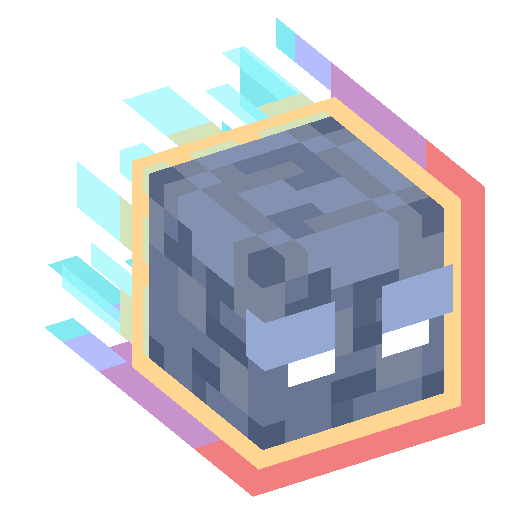
Direwolf Cap | 2x |
Hat | |
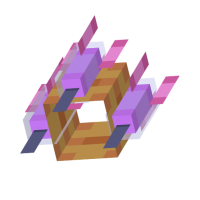
|
Dart Bracer | 4x |
Accessory | |
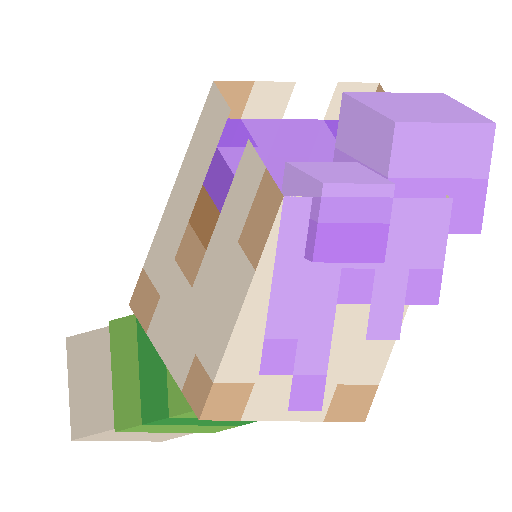
| Feathery Arm | 4x |
Accessory | ||
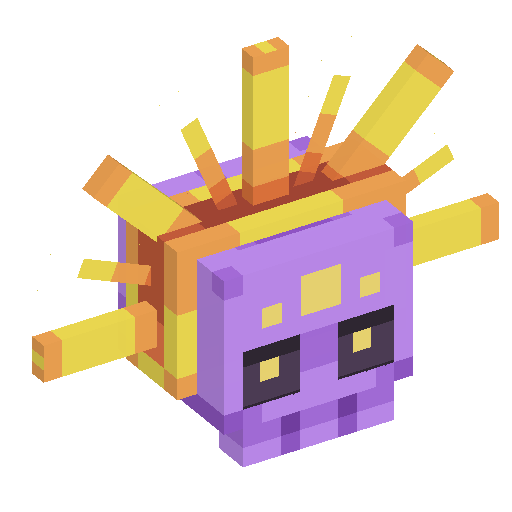
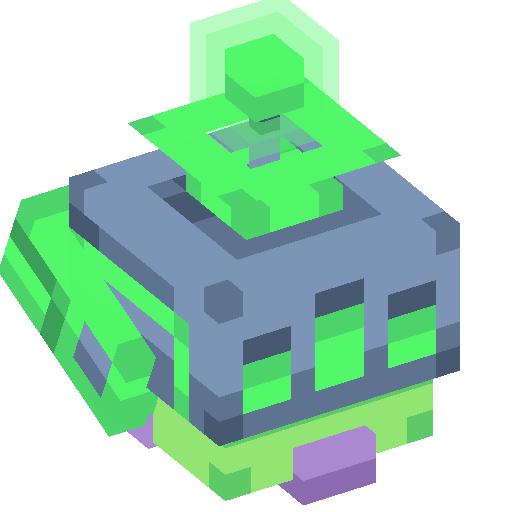
| Skull Orb (Golden) | 4x |
Accessory | ||
| Blowdart | 4x |
Hat | ||
| Feathery Cap | 4x |
Hat | ||
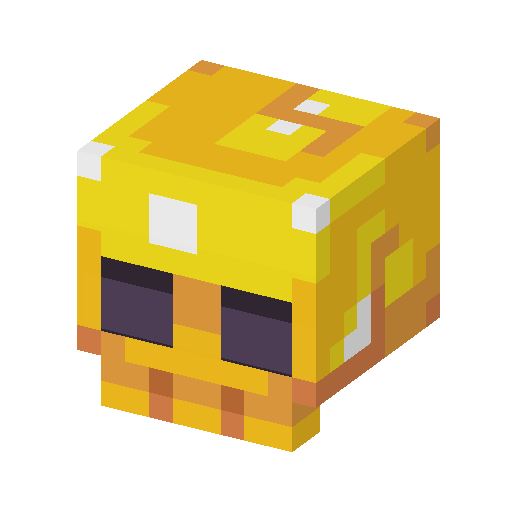
| Skull Crown (Golden) | 4x |
Hat |
Season 3
All of Season 3's Cosmetics could be bought from The Inventor in the Battle Pass Plaza for ![]() Candy Factory Tokens.
Candy Factory Tokens.
| Display | Cosmetic | Cost | Type | Rarity |
|---|---|---|---|---|
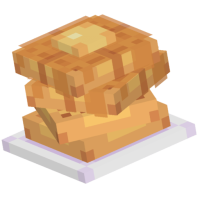
|
Waffle Stack | 25x |
Hat | |
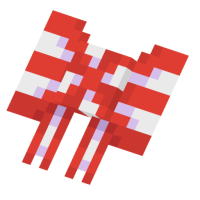
|
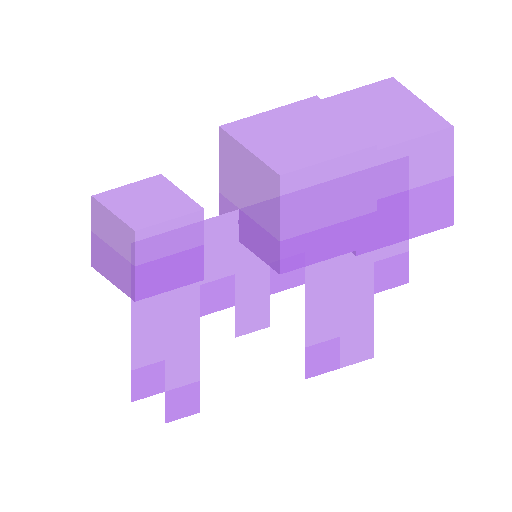
Hairbow (Peppermint) | 35x |
Hat | |
|
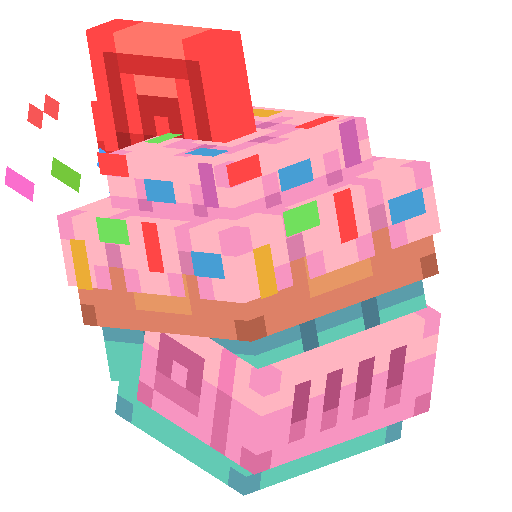
Cupcake (Choco) | 60x |
Hat | |
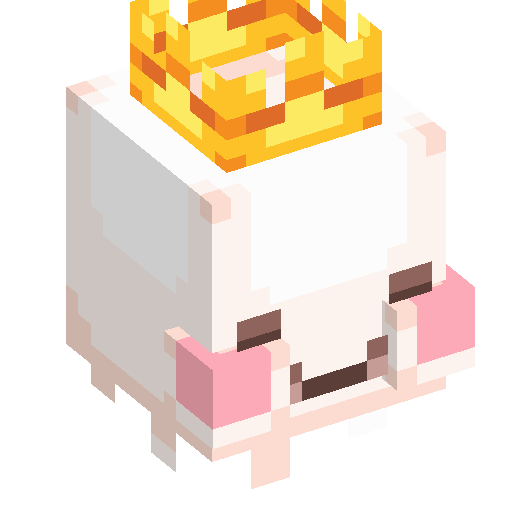
| Mellowhead (Monarch) | 60x |
Hat | ||
| Cupcake (Knight) | 90x |
Hat | ||
|
Waffle Shield | 25x |
Accessory | |
|
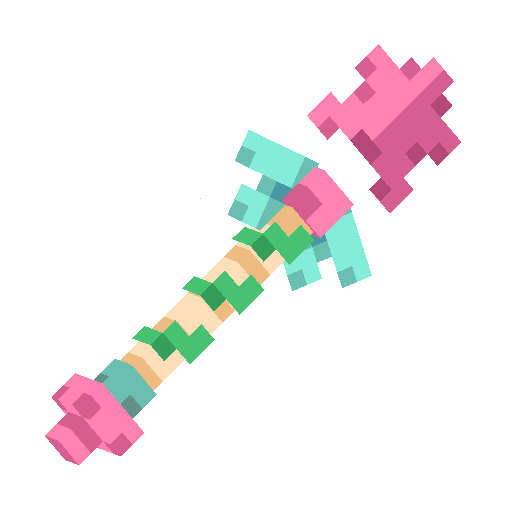
Lollipop Staff | 25x |
Accessory | |
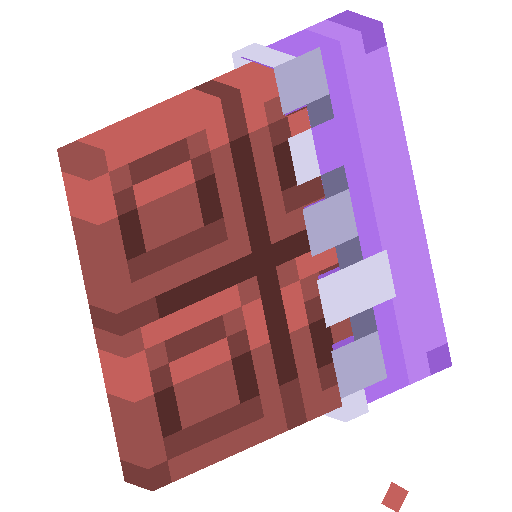
| Choco Shield | 50x |
Accessory | ||
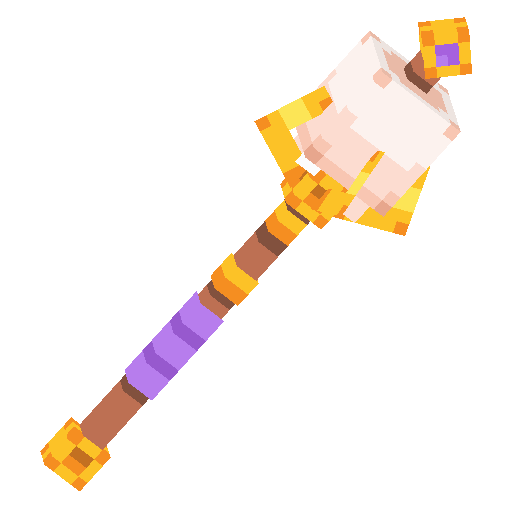
| S'more Staff (Royalty) | 50x |
Accessory | ||
|
Cupcake Staff (Spearhead) | 75x |
Accessory |
Season 2
All of Season 2's Cosmetics could be bought from Spacefarer Sarah in the Battle Pass Plaza for ![]() Neon Galaxy Tokens.
Neon Galaxy Tokens.
| Display | Cosmetic | Cost | Type | Rarity |
|---|---|---|---|---|
|
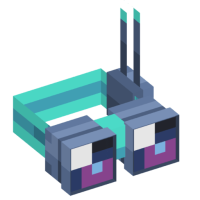
Star Scouter | 25x |
Hat | |
| Space Slug | 35x |
Hat | ||
|
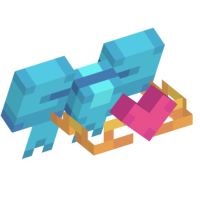
Star Sailor's Tiara | 60x |
Hat | |
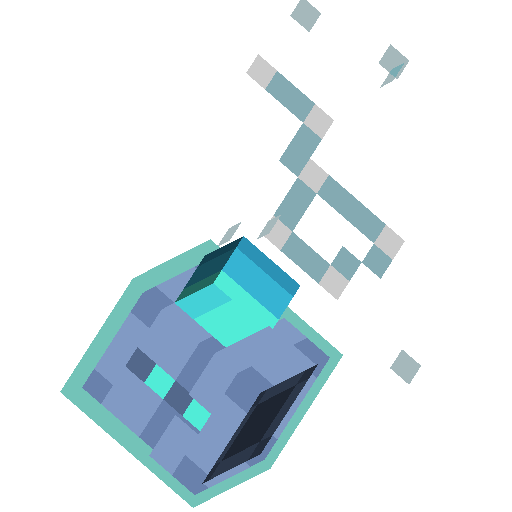
| Comet Head | 60x |
Hat | ||
| Alien Visor | 90x |
Hat | ||
| Constellation Cartographer | 25x |
Accessory | ||
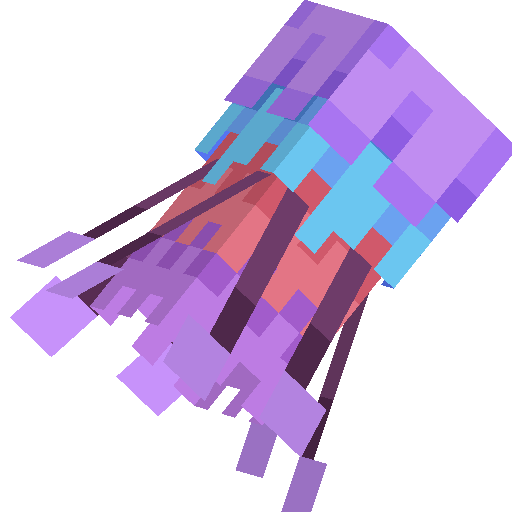
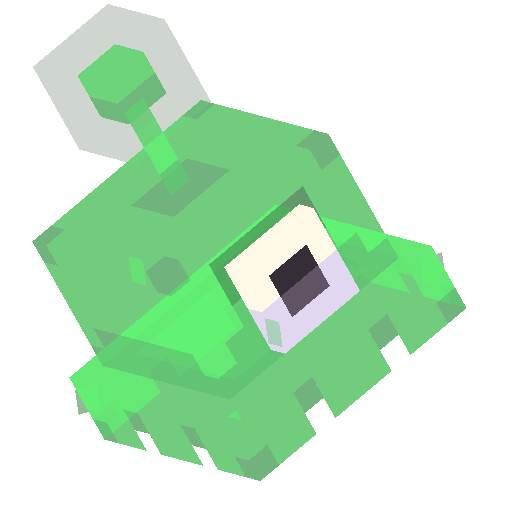
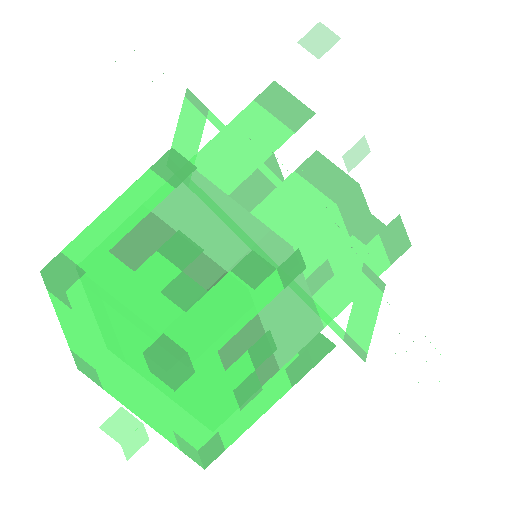
| Space Slime | 25x |
Accessory | ||
|
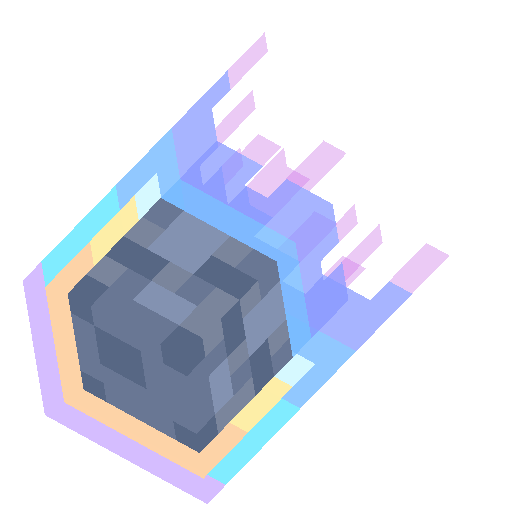
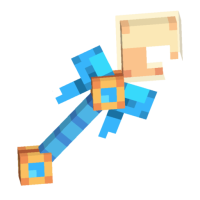
Star Sailor's Staff (Crescent) | 50x |
Accessory | |
| Comet Fist | 50x |
Accessory | ||
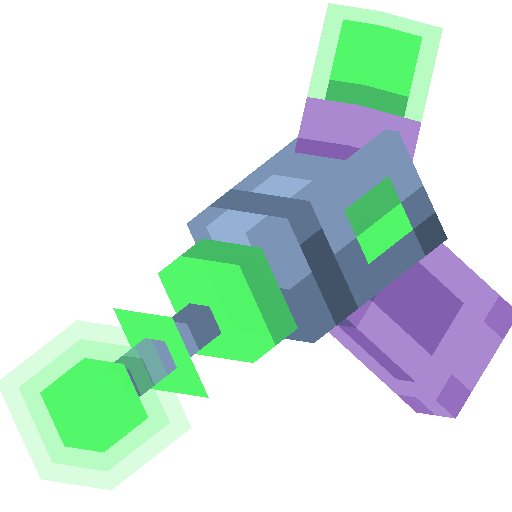
| Ray Blaster (Alien) | 75x |
Accessory |
Season 1
All of Season 1's Cosmetics could be bought from Seasonal Spencer in the Battle Pass Plaza for ![]() Coins.
Coins.
| Display | Cosmetic | Cost | Type | Rarity |
|---|---|---|---|---|
| Starfish Staff | 90,000 |
Accessory | ||
|
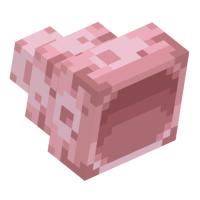
Sea Shell | 135,000 |
Hat | |
| Coral Fist | 180,000 |
Accessory | ||
|
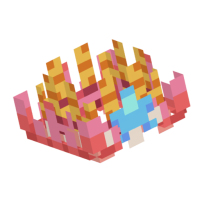
Coral Crown | 270,000 |
Hat | |
| Octopus | 450,000 |
Hat |
