Seasonal Vendor: Difference between revisions
From MCC Island Wiki
More actions
Season 4 (not done yet, just need legendary cosmetics) |
m Added cosmetic links + fixed two switched cosmetics in table |
||
| Line 12: | Line 12: | ||
|- | |- | ||
|<div style="width: 200px">[[File:Ancient Potion.gif]]</div> | |<div style="width: 200px">[[File:Ancient Potion.gif]]</div> | ||
|Ancient Potion | |[[Ancient Potion]] | ||
|2x [[File:Ancient Jungle Shard.gif|frameless|32x32px]] Ancient Jungle Shards | |2x [[File:Ancient Jungle Shard.gif|frameless|32x32px]] Ancient Jungle Shards | ||
|Accessory | |Accessory | ||
| Line 18: | Line 18: | ||
|- | |- | ||
|[[File:Bone Club.png|200x200px]] | |[[File:Bone Club.png|200x200px]] | ||
|Bone Club | |[[Bone Club]] | ||
|2x [[File:Ancient Jungle Shard.gif|frameless|32x32px]] Ancient Jungle Shards | |2x [[File:Ancient Jungle Shard.gif|frameless|32x32px]] Ancient Jungle Shards | ||
|Accessory | |Accessory | ||
| Line 24: | Line 24: | ||
|- | |- | ||
|[[File:Bone Claw.png|200x200px]] | |[[File:Bone Claw.png|200x200px]] | ||
|Bone Claw | |[[Bone Claw]] | ||
|2x [[File:Ancient Jungle Shard.gif|frameless|32x32px]] Ancient Jungle Shards | |2x [[File:Ancient Jungle Shard.gif|frameless|32x32px]] Ancient Jungle Shards | ||
|Accessory | |Accessory | ||
| Line 30: | Line 30: | ||
|- | |- | ||
|<div style="width: 200px">[[File:Potion Frenzy.gif]]</div> | |<div style="width: 200px">[[File:Potion Frenzy.gif]]</div> | ||
|Potion Frenzy | |[[Potion Frenzy]] | ||
|2x [[File:Ancient Jungle Shard.gif|frameless|32x32px]] Ancient Jungle Shards | |2x [[File:Ancient Jungle Shard.gif|frameless|32x32px]] Ancient Jungle Shards | ||
|Hat | |Hat | ||
| Line 36: | Line 36: | ||
|- | |- | ||
|[[File:Rock on Head.png|200x200px]] | |[[File:Rock on Head.png|200x200px]] | ||
|Rock on Head | |[[Rock on Head]] | ||
|2x [[File:Ancient Jungle Shard.gif|frameless|32x32px]] Ancient Jungle Shards | |2x [[File:Ancient Jungle Shard.gif|frameless|32x32px]] Ancient Jungle Shards | ||
|Hat | |Hat | ||
| Line 42: | Line 42: | ||
|- | |- | ||
|[[File:Direwolf Cap.png|200x200px]] | |[[File:Direwolf Cap.png|200x200px]] | ||
|Direwolf Cap | |[[Direwolf Cap]] | ||
|2x [[File:Ancient Jungle Shard.gif|frameless|32x32px]] Ancient Jungle Shards | |2x [[File:Ancient Jungle Shard.gif|frameless|32x32px]] Ancient Jungle Shards | ||
|Hat | |Hat | ||
| Line 48: | Line 48: | ||
|- | |- | ||
|[[File:Dart Bracer.png|200x200px]] | |[[File:Dart Bracer.png|200x200px]] | ||
|Dart Bracer | |[[Dart Bracer]] | ||
|4x [[File:Ancient Jungle Shard.gif|frameless|32x32px]] Ancient Jungle Shards | |4x [[File:Ancient Jungle Shard.gif|frameless|32x32px]] Ancient Jungle Shards | ||
|Accessory | |Accessory | ||
| Line 54: | Line 54: | ||
|- | |- | ||
|<div style="width: 200px">[[File:Feathery Arm.gif]]</div> | |<div style="width: 200px">[[File:Feathery Arm.gif]]</div> | ||
|Feathery Arm | |[[Feathery Arm]] | ||
|4x [[File:Ancient Jungle Shard.gif|frameless|32x32px]] Ancient Jungle Shards | |4x [[File:Ancient Jungle Shard.gif|frameless|32x32px]] Ancient Jungle Shards | ||
|Accessory | |Accessory | ||
| Line 60: | Line 60: | ||
|- | |- | ||
|<div style="width: 200px">[[File:Skull Orb (Golden).gif]]</div> | |<div style="width: 200px">[[File:Skull Orb (Golden).gif]]</div> | ||
|Skull Orb (Golden) | |[[Skull Orb (Golden)]] | ||
|4x [[File:Ancient Jungle Shard.gif|frameless|32x32px]] Ancient Jungle Shards | |4x [[File:Ancient Jungle Shard.gif|frameless|32x32px]] Ancient Jungle Shards | ||
|Accessory | |Accessory | ||
| Line 66: | Line 66: | ||
|- | |- | ||
|<div style="width: 200px">[[File:Blowdart.gif]]</div> | |<div style="width: 200px">[[File:Blowdart.gif]]</div> | ||
|Blowdart | |[[Blowdart]] | ||
|4x [[File:Ancient Jungle Shard.gif|frameless|32x32px]] Ancient Jungle Shards | |4x [[File:Ancient Jungle Shard.gif|frameless|32x32px]] Ancient Jungle Shards | ||
|Hat | |Hat | ||
| Line 72: | Line 72: | ||
|- | |- | ||
|<div style="width: 200px">[[File:Feathery Cap.gif]]</div> | |<div style="width: 200px">[[File:Feathery Cap.gif]]</div> | ||
|Feathery Cap | |[[Feathery Cap]] | ||
|4x [[File:Ancient Jungle Shard.gif|frameless|32x32px]] Ancient Jungle Shards | |4x [[File:Ancient Jungle Shard.gif|frameless|32x32px]] Ancient Jungle Shards | ||
|Hat | |Hat | ||
| Line 78: | Line 78: | ||
|- | |- | ||
|<div style="width: 200px">[[File:Skull Crown (Golden).gif]]</div> | |<div style="width: 200px">[[File:Skull Crown (Golden).gif]]</div> | ||
|Skull Crown (Golden) | |[[Skull Crown (Golden)]] | ||
|4x [[File:Ancient Jungle Shard.gif|frameless|32x32px]] Ancient Jungle Shards | |4x [[File:Ancient Jungle Shard.gif|frameless|32x32px]] Ancient Jungle Shards | ||
|Hat | |Hat | ||
| Line 95: | Line 95: | ||
|- | |- | ||
|[[File:Waffle Stack.png|200x200px]] | |[[File:Waffle Stack.png|200x200px]] | ||
|Waffle Stack | |[[Waffle Stack]] | ||
|25x [[File:Candy Factory Token.png|32x32px]] Candy Factory Tokens | |25x [[File:Candy Factory Token.png|32x32px]] Candy Factory Tokens | ||
|Hat | |Hat | ||
| Line 101: | Line 101: | ||
|- | |- | ||
|[[File:Hairbow (Peppermint).png|200x200px]] | |[[File:Hairbow (Peppermint).png|200x200px]] | ||
|Hairbow (Peppermint) | |[[Hairbow (Peppermint)]] | ||
|35x [[File:Candy Factory Token.png|32x32px]] Candy Factory Tokens | |35x [[File:Candy Factory Token.png|32x32px]] Candy Factory Tokens | ||
|Hat | |Hat | ||
| Line 107: | Line 107: | ||
|- | |- | ||
|[[File:Cupcake (Choco).png|200x200px]] | |[[File:Cupcake (Choco).png|200x200px]] | ||
|Cupcake (Choco) | |[[Cupcake (Choco)]] | ||
|60x [[File:Candy Factory Token.png|32x32px]] Candy Factory Tokens | |60x [[File:Candy Factory Token.png|32x32px]] Candy Factory Tokens | ||
|Hat | |Hat | ||
| Line 113: | Line 113: | ||
|- | |- | ||
|<div style="width: 200px">[[File:Mellowhead (Monarch).gif]]</div> | |<div style="width: 200px">[[File:Mellowhead (Monarch).gif]]</div> | ||
|Mellowhead (Monarch) | |[[Mellowhead (Monarch)]] | ||
|60x [[File:Candy Factory Token.png|32x32px]] Candy Factory Tokens | |60x [[File:Candy Factory Token.png|32x32px]] Candy Factory Tokens | ||
|Hat | |Hat | ||
| Line 119: | Line 119: | ||
|- | |- | ||
|<div style="width: 200px">[[File:Cupcake (Knight).gif]]</div> | |<div style="width: 200px">[[File:Cupcake (Knight).gif]]</div> | ||
|Cupcake (Knight) | |[[Cupcake (Knight)]] | ||
|90x [[File:Candy Factory Token.png|32x32px]] Candy Factory Tokens | |90x [[File:Candy Factory Token.png|32x32px]] Candy Factory Tokens | ||
|Hat | |Hat | ||
| Line 125: | Line 125: | ||
|- | |- | ||
|[[File:Waffle Shield.png|200x200px]] | |[[File:Waffle Shield.png|200x200px]] | ||
|Waffle Shield | |[[Waffle Shield]] | ||
|25x [[File:Candy Factory Token.png|32x32px]] Candy Factory Tokens | |25x [[File:Candy Factory Token.png|32x32px]] Candy Factory Tokens | ||
|Accessory | |Accessory | ||
| Line 131: | Line 131: | ||
|- | |- | ||
|[[File:Lollipop Staff.png|200x200px]] | |[[File:Lollipop Staff.png|200x200px]] | ||
|Lollipop Staff | |[[Lollipop Staff]] | ||
|25x [[File:Candy Factory Token.png|32x32px]] Candy Factory Tokens | |25x [[File:Candy Factory Token.png|32x32px]] Candy Factory Tokens | ||
|Accessory | |Accessory | ||
| Line 137: | Line 137: | ||
|- | |- | ||
|<div style="width: 200px">[[File:Choco Shield.gif]]</div> | |<div style="width: 200px">[[File:Choco Shield.gif]]</div> | ||
|Choco Shield | |[[Choco Shield]] | ||
|50x [[File:Candy Factory Token.png|32x32px]] Candy Factory Tokens | |50x [[File:Candy Factory Token.png|32x32px]] Candy Factory Tokens | ||
|Accessory | |Accessory | ||
| Line 143: | Line 143: | ||
|- | |- | ||
|<div style="width: 200px">[[File:Smore Staff (Royalty).gif]]</div> | |<div style="width: 200px">[[File:Smore Staff (Royalty).gif]]</div> | ||
|S'more Staff (Royalty) | |[[S'more Staff (Royalty)]] | ||
|50x [[File:Candy Factory Token.png|32x32px]] Candy Factory Tokens | |50x [[File:Candy Factory Token.png|32x32px]] Candy Factory Tokens | ||
|Accessory | |Accessory | ||
| Line 149: | Line 149: | ||
|- | |- | ||
|[[File:Cupcake Staff (Spearhead).png|200x200px]] | |[[File:Cupcake Staff (Spearhead).png|200x200px]] | ||
|Cupcake Staff (Spearhead) | |[[Cupcake Staff (Spearhead)]] | ||
|75x [[File:Candy Factory Token.png|32x32px]] Candy Factory Tokens | |75x [[File:Candy Factory Token.png|32x32px]] Candy Factory Tokens | ||
|Accessory | |Accessory | ||
| Line 165: | Line 165: | ||
|- | |- | ||
|[[File:Star Scouter.png|200x200px]] | |[[File:Star Scouter.png|200x200px]] | ||
|Star Scouter | |[[Star Scouter]] | ||
|25x [[File:Neon Galaxy Token.png|32x32px]] Neon Galaxy Tokens | |25x [[File:Neon Galaxy Token.png|32x32px]] Neon Galaxy Tokens | ||
|Hat | |Hat | ||
| Line 171: | Line 171: | ||
|- | |- | ||
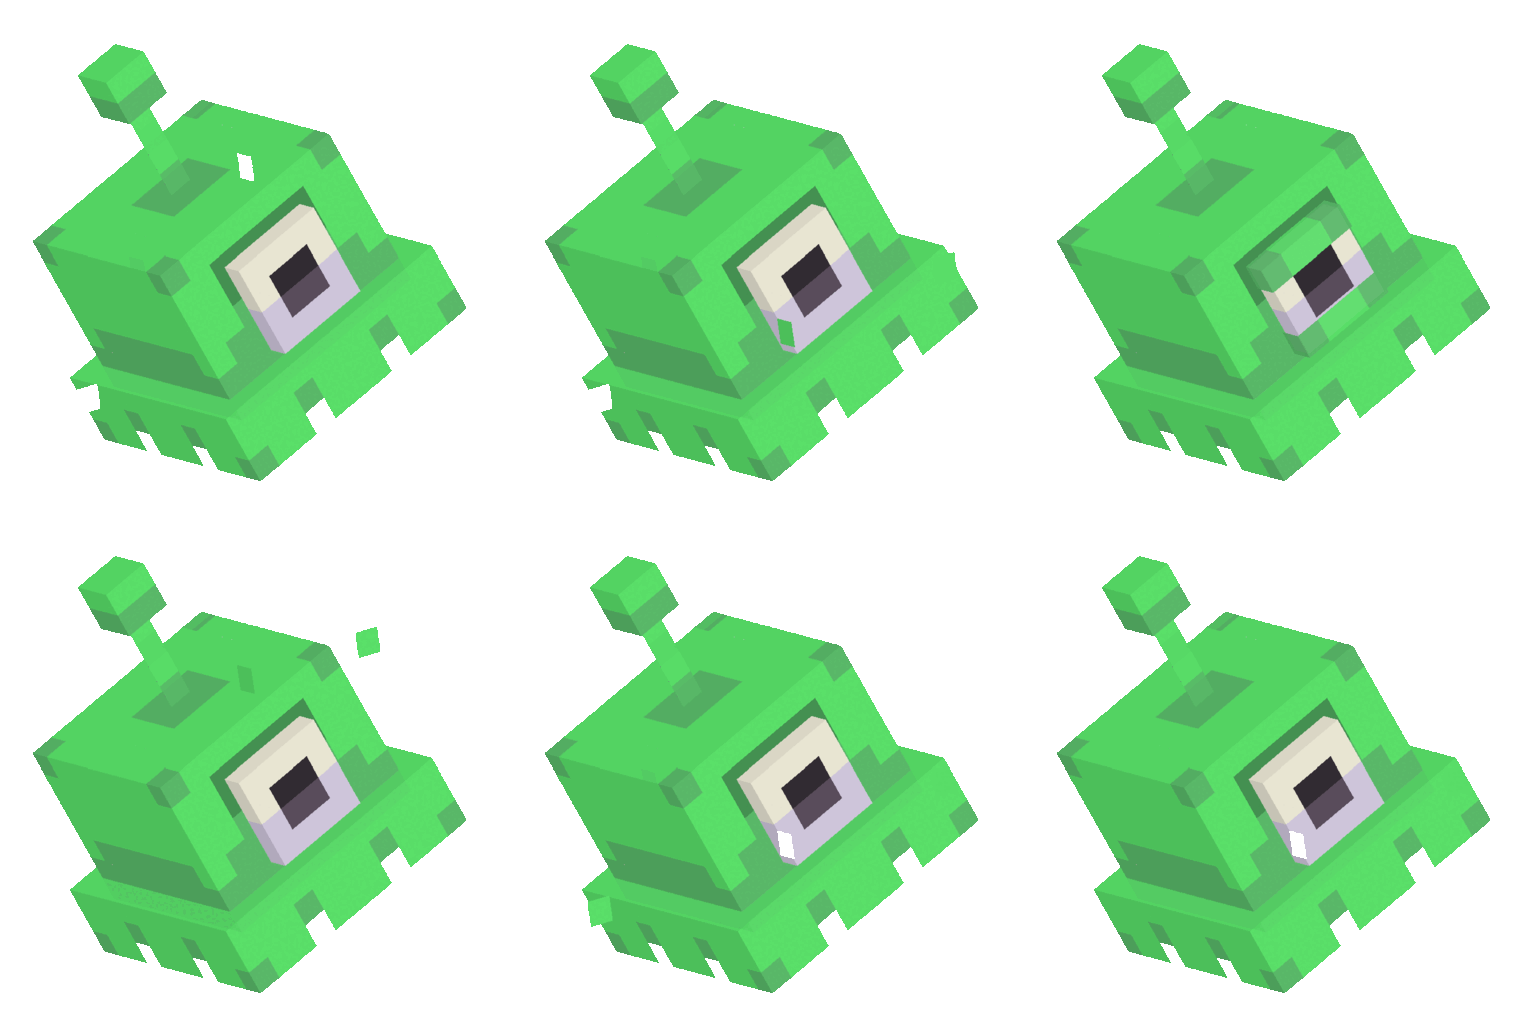
|<div style="width: 200px">[[File:Space Slug.gif]]</div> | |<div style="width: 200px">[[File:Space Slug.gif]]</div> | ||
|Space Slug | |[[Space Slug]] | ||
|35x [[File:Neon Galaxy Token.png|32x32px]] Neon Galaxy Tokens | |35x [[File:Neon Galaxy Token.png|32x32px]] Neon Galaxy Tokens | ||
|Hat | |Hat | ||
| Line 177: | Line 177: | ||
|- | |- | ||
|[[File:Star Sailor's Tiara.png|200x200px]] | |[[File:Star Sailor's Tiara.png|200x200px]] | ||
|Star Sailor's Tiara | |[[Star Sailor's Tiara]] | ||
|60x [[File:Neon Galaxy Token.png|32x32px]] Neon Galaxy Tokens | |60x [[File:Neon Galaxy Token.png|32x32px]] Neon Galaxy Tokens | ||
|Hat | |Hat | ||
|{{Rarity|Epic}} | |{{Rarity|Epic}} | ||
|- | |- | ||
|<div style="width: 200px">[[File: | |<div style="width: 200px">[[File:Comet Head.gif]]</div> | ||
| | |[[Comet Head]] | ||
|60x [[File:Neon Galaxy Token.png|32x32px]] Neon Galaxy Tokens | |60x [[File:Neon Galaxy Token.png|32x32px]] Neon Galaxy Tokens | ||
|Hat | |Hat | ||
|{{Rarity|Epic}} | |{{Rarity|Epic}} | ||
|- | |- | ||
|<div style="width: 200px">[[File: | |<div style="width: 200px">[[File:Alien Visor.gif]]</div> | ||
| | |[[Alien Visor]] | ||
|90x [[File:Neon Galaxy Token.png|32x32px]] Neon Galaxy Tokens | |90x [[File:Neon Galaxy Token.png|32x32px]] Neon Galaxy Tokens | ||
|Hat | |Hat | ||
| Line 195: | Line 195: | ||
|- | |- | ||
|<div style="width: 200px">[[File:Constellation Cartographer.gif]]</div> | |<div style="width: 200px">[[File:Constellation Cartographer.gif]]</div> | ||
|Constellation Cartographer | |[[Constellation Cartographer]] | ||
|25x [[File:Neon Galaxy Token.png|32x32px]] Neon Galaxy Tokens | |25x [[File:Neon Galaxy Token.png|32x32px]] Neon Galaxy Tokens | ||
|Accessory | |Accessory | ||
| Line 201: | Line 201: | ||
|- | |- | ||
|<div style="width: 200px">[[File:Space Slime.gif]]</div> | |<div style="width: 200px">[[File:Space Slime.gif]]</div> | ||
|Space Slime | |[[Space Slime]] | ||
|25x [[File:Neon Galaxy Token.png|32x32px]] Neon Galaxy Tokens | |25x [[File:Neon Galaxy Token.png|32x32px]] Neon Galaxy Tokens | ||
|Accessory | |Accessory | ||
| Line 207: | Line 207: | ||
|- | |- | ||
|[[File:Star Sailor's Staff (Crescent).png|200x200px]] | |[[File:Star Sailor's Staff (Crescent).png|200x200px]] | ||
|Star Sailor's Staff (Crescent) | |[[Star Sailor's Staff (Crescent)]] | ||
|50x [[File:Neon Galaxy Token.png|32x32px]] Neon Galaxy Tokens | |50x [[File:Neon Galaxy Token.png|32x32px]] Neon Galaxy Tokens | ||
|Accessory | |Accessory | ||
| Line 213: | Line 213: | ||
|- | |- | ||
|<div style="width: 200px">[[File:Comet Fist.gif]]</div> | |<div style="width: 200px">[[File:Comet Fist.gif]]</div> | ||
|Comet Fist | |[[Comet Fist]] | ||
|50x [[File:Neon Galaxy Token.png|32x32px]] Neon Galaxy Tokens | |50x [[File:Neon Galaxy Token.png|32x32px]] Neon Galaxy Tokens | ||
|Accessory | |Accessory | ||
| Line 219: | Line 219: | ||
|- | |- | ||
|<div style="width: 200px">[[File:Ray Blaster (Alien).gif]]</div> | |<div style="width: 200px">[[File:Ray Blaster (Alien).gif]]</div> | ||
|Ray Blaster (Alien) | |[[Ray Blaster (Alien)]] | ||
|75x [[File:Neon Galaxy Token.png|32x32px]] Neon Galaxy Tokens | |75x [[File:Neon Galaxy Token.png|32x32px]] Neon Galaxy Tokens | ||
|Accessory | |Accessory | ||
| Line 236: | Line 236: | ||
|- | |- | ||
|<div style="width: 200px">[[File:Starfish Staff.gif]]</div> | |<div style="width: 200px">[[File:Starfish Staff.gif]]</div> | ||
|Starfish Staff | |[[Starfish Staff]] | ||
|90,000 {{Coin}} Coins | |90,000 {{Coin}} Coins | ||
|Accessory | |Accessory | ||
| Line 242: | Line 242: | ||
|- | |- | ||
|[[File:Sea Shell.png|200x200px]] | |[[File:Sea Shell.png|200x200px]] | ||
|Sea Shell | |[[Sea Shell]] | ||
|135,000 {{Coin}} Coins | |135,000 {{Coin}} Coins | ||
|Hat | |Hat | ||
| Line 248: | Line 248: | ||
|- | |- | ||
|<div style="width: 200px">[[File:Coral Fist.gif]]</div> | |<div style="width: 200px">[[File:Coral Fist.gif]]</div> | ||
|Coral Fist | |[[Coral Fist]] | ||
|180,000 {{Coin}} Coins | |180,000 {{Coin}} Coins | ||
|Accessory | |Accessory | ||
| Line 254: | Line 254: | ||
|- | |- | ||
|[[File:Coral Crown.png|200x200px]] | |[[File:Coral Crown.png|200x200px]] | ||
|Coral Crown | |[[Coral Crown]] | ||
|270,000 {{Coin}} Coins | |270,000 {{Coin}} Coins | ||
|Hat | |Hat | ||
| Line 260: | Line 260: | ||
|- | |- | ||
|[[File:S1-Octopus.png|200x200px]] | |[[File:S1-Octopus.png|200x200px]] | ||
|Octopus | |[[Octopus]] | ||
|450,000 {{Coin}} Coins | |450,000 {{Coin}} Coins | ||
|Hat | |Hat | ||
|{{Rarity|Legendary}} | |{{Rarity|Legendary}} | ||
|} | |} | ||
Revision as of 12:02, 22 April 2024
The Seasonal Vendor is the vendor in the Seasonal Plaza where the player can buy season-exclusive cosmetics for ![]() seasonal shards. The Temple Master will currently sell you all season-exclusive cosmetics at the Seasonal shop. All previous and current cosmetics can be seen in the table below.
seasonal shards. The Temple Master will currently sell you all season-exclusive cosmetics at the Seasonal shop. All previous and current cosmetics can be seen in the table below.
Season 4
All of Season 4's Cosmetics can be bought from the Temple Master in the Seasonal Plaza for ![]() Ancient Jungle Shards.
Ancient Jungle Shards.
| Display | Cosmetic | Cost | Type | Rarity |
|---|---|---|---|---|
| Ancient Potion | 2x |
Accessory | ||
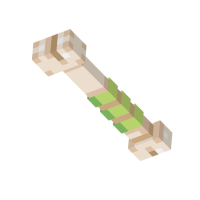
|
Bone Club | 2x |
Accessory | |
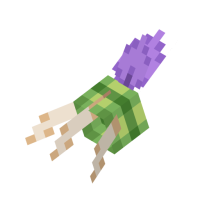
|
Bone Claw | 2x |
Accessory | |
| Potion Frenzy | 2x |
Hat | ||
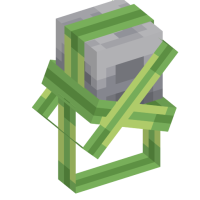
|
Rock on Head | 2x |
Hat | |
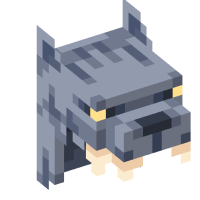
|
Direwolf Cap | 2x |
Hat | |
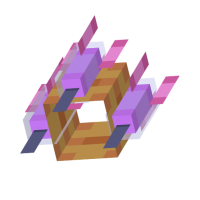
|
Dart Bracer | 4x |
Accessory | |
| Feathery Arm | 4x |
Accessory | ||
| Skull Orb (Golden) | 4x |
Accessory | ||
| Blowdart | 4x |
Hat | ||
| Feathery Cap | 4x |
Hat | ||
| Skull Crown (Golden) | 4x |
Hat |
Season 3
All of Season 3's Cosmetics could be bought from The Inventor in the Battle Pass Plaza for ![]() Candy Factory Tokens.
Candy Factory Tokens.
| Display | Cosmetic | Cost | Type | Rarity |
|---|---|---|---|---|
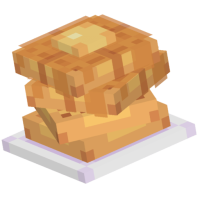
|
Waffle Stack | 25x |
Hat | |
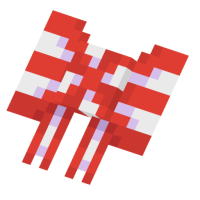
|
Hairbow (Peppermint) | 35x |
Hat | |
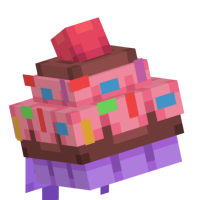
|
Cupcake (Choco) | 60x |
Hat | |
| Mellowhead (Monarch) | 60x |
Hat | ||
| Cupcake (Knight) | 90x |
Hat | ||
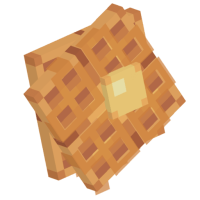
|
Waffle Shield | 25x |
Accessory | |
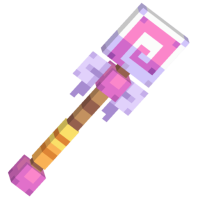
|
Lollipop Staff | 25x |
Accessory | |
| Choco Shield | 50x |
Accessory | ||
| S'more Staff (Royalty) | 50x |
Accessory | ||
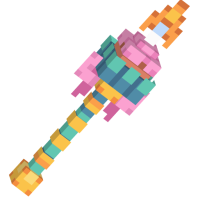
|
Cupcake Staff (Spearhead) | 75x |
Accessory |
Season 2
All of Season 2's Cosmetics could be bought from Spacefarer Sarah in the Battle Pass Plaza for ![]() Neon Galaxy Tokens.
Neon Galaxy Tokens.
| Display | Cosmetic | Cost | Type | Rarity |
|---|---|---|---|---|
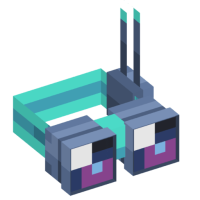
|
Star Scouter | 25x |
Hat | |
| Space Slug | 35x |
Hat | ||
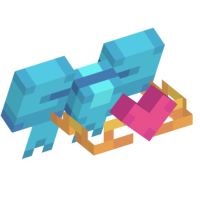
|
Star Sailor's Tiara | 60x |
Hat | |
| Comet Head | 60x |
Hat | ||
| Alien Visor | 90x |
Hat | ||
| Constellation Cartographer | 25x |
Accessory | ||
| Space Slime | 25x |
Accessory | ||
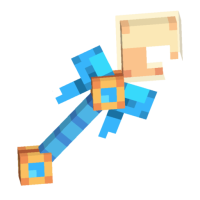
|
Star Sailor's Staff (Crescent) | 50x |
Accessory | |
| Comet Fist | 50x |
Accessory | ||
| Ray Blaster (Alien) | 75x |
Accessory |
Season 1
All of Season 1's Cosmetics could be bought from Spacefarer Sarah in the Battle Pass Plaza for ![]() Coins.
Coins.
| Display | Cosmetic | Cost | Type | Rarity |
|---|---|---|---|---|
| Starfish Staff | 90,000 |
Accessory | ||
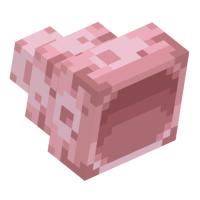
|
Sea Shell | 135,000 |
Hat | |
| Coral Fist | 180,000 |
Accessory | ||
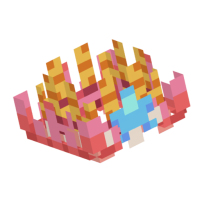
|
Coral Crown | 270,000 |
Hat | |
| File:S1-Octopus.png | Octopus | 450,000 |
Hat |
